
BLX2 MANUAL
LET us RIP
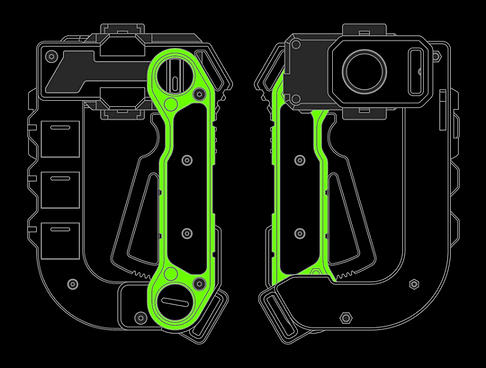
CHARGING LEVER
Squeeze the Charging Lever to engage the primary launch systems:
-
Partial engagement will activate the targeting LED
-
Full engagement will activate the coil overdrive mechanism
-
Each is mutually exclusive to ensure maximum power delivery
-
Vent cooling flaps open in unison with lever operation
-
Caution! Open flaps are weakpoints. Enemy combatants may attempt to shoot into exposed core!

RIPCORD BYPASS
The Bypass Toggle alters the path of the ripcord when inserted
-
In STOW mode, the ripcord is safely and conveniently tucked inside the chassis. Inserting and removing the ripcord requires additional force. Launching can be achieved if necessary
-
In PASS mode, the ripcord passes straight through the chassis, minimizing friction. Ideal for maximizing launch force
-
Bypass cannot be toggled with ripcord inserted

WARP DIAL
The Warp Dial adjusts the warp factor applied to the Beyblade.
-
Rotate the dial in any direction. Due to limited space, only settings 01 and 10 are indicated; user must count the detents for intermediate settings
-
(Secret): This dial is a remnant from the host Fusion Coil Winder device. Fusion coils require delicate re-winding settings depending on their age. No such tuning is possible with Beyblade launchers, instead relying on user technique. The Warp Dial is not connected to the launcher, but your opponent might not know that. Strategic and overt manipulation of the dial may prove useful as a psychological tactic.

PRONG COVER
The Prong Cover protects the Beyblade launcher prongs when not in use.
-
To remove the Cover, lift up on the slotted edge
-
To install Cover, first clean any debris and then press-fit it over the prongs
-
NOTE: The Cover can only be installed in two different positions. During prototyping, removal from a certain direction was found to stress the launcher prong assembly, which could have lead to damage. This direction of leverage has been blocked
-
The Prong Cover can also double as a sling point. Install the included velcro carabiner in the slot. Test the force required to remove it to avoid accidental removal

BATTERY SWITCH
The Battery Switch toggles the main power to the Charging Lever.
-
Use a small object or long fingernail to toggle the switch
-
There is no need to use this switch on a regular basis - it can be left on, as the Charging Lever contains additional switches that complete the circuit(s)
-
It is recommended to switch the power off during disassembly


The BLX2 Beysar Winder Launcher is a Beyblade launch assist tool. Designed for optimal aura farming, it features an overcharging animation and drop zone targeting field, as well as some options for convenient carrying.
These devices are adapted from FCW-X2 Fusion Coil Winders, which are typically used in industrial facilities to service fusion coils. The Beysar mod replaces the stock toolhead with a Beyblade launcher and de-tunes certain properties to avoid destroying the Beyblades.
It is designed for the official Takara Tomy Beyblade X winder launcher and has not been tested with other launchers. It comes with an unmodified launcher pre-installed to ensure compatability. Starside Armory can make no guarantee about tournament legality.
In fact, the Beysar was developed with the shady, barely regulated tournaments one might find in the third most popular bar of a dusty frontier trading settlement, where a rep boost might net you something better than a tournament prize. It might even net you more than you bargained for...
BATTERY SWAP
Battery can be swapped without any special tools:
-
Battery type: (1) CR2032 coin cell, commonly available at drug and general stores
-
Battery is contained in a clamshell holder. This holder is held with friction in a slot
-
To eject the holder, use a narrow object such as a key or screwdriver to gently push it out of the slot. Avoid pushing on the nearby switch. As the holder slides out, take note of the orientation so that it can be re-inserted correctly
-
Opening the holder is fiddly, requiring prying on two little tabs, but you'll get it
-
Removing the battery is also a little bit tricky. Flexing the holder a bit and prying on the battery edge can help
-
Replace the battery. The positive side should be "up"/visible before closing the holder
-
Slide the holder back into the slot. Make sure the wires are not twisted. If the wires are not twisted, they should be automatically routed into place. This should not require any force - if the holder feels jammed, pull it back out and check for obstruction or unruly wires

IF ANY OF THE BELOW TROUBLESHOOTING DOESN't WORK, CONTACT ME!
TROUBLESHOOT: LEDS DON'T ACTIVATE
The LEDs could be misbehavin' for a variety of reasons. Follow these steps:
-
Check the power switch
-
Replace the battery
-
If the targeting LED works but the core LED doesn't, check the microswitch levers:
-
Remove the grip scale on the side with the Beysar nameplate
-
You should see two white microswitches. The metal lever on the lower switch needs to move a certain amount to activate. If the charging lever doesn't cause the lower switch to make an audible click, the metal lever on the microswitch needs to be adjusted
-
Use tweezers to GENTLY bend the metal lever at its mid-point so that it reaches closer to the charging lever. This should allow the charging lever to press on the metal lever sooner and more reliably
-
If it's none of those things, the issue is likely a bad connection, short, or dead LED. This won't be easy to solve unless you're familiar with that kind of stuff. Contact me for help or repair!
TROUBLESHOOT: FLAPS STUCK OPEN
The flaps operate with a carefully calibrated elastic loop. If this elastic wears out or friction enters the system, the flaps might not close properly. If this occurs, there are various solutions, listed from easiest to hardest:
-
Manually close the flaps
-
Blow any dust or debris out of the flap area
-
Disassemble the lower case;
-
Ensure the zipties on the flap linkage are not colliding with something
-
Clean and grease the flap pivots
-
Replace the elastic, reproducing the original as closely as possible. Erring on the side of more tension will assist flap closure at the cost of a heavier charging lever pull
-
It's also possible that the flaps are not the issue, but instead the charging lever may be jammed. It may be both.
TROUBLESHOOT: CHARGING LEVER JAMMED
If the charging lever is stuck squeezed-in, friction may have entered the system. If this occurs, there are various solutions, listed from easiest to hardest:
-
Pull on the upper end of the lever (similar to a gun trigger)
-
Blow any dust or debris out of the handle
-
Disassemble the grip;
-
Loosen the (4) M4 x 20 screws holding the grip together. If overtightened, the grip frame sometimes squeezes the lever, jamming it. The screw which serves as the lever pivot is not to be tight at all - it's held in by the grip scales
-
Clean and grease the lever as well as the toothed gear
-
It's also possible the the lever is not the issue, but instead the flaps may be jammed. It may be both.
DIS/RE-ASSEMBLY
The Beysar can be disassembled for repair or customization.
If dis/re-assembly is des/requ-ired, this section will offer some tips to assist you. However, it is recommended that you have some level of mechanical aptitude.
Required Tools/Supplies:
-
2.0mm hex wrench (for M3 screws)
-
2.5mm hex wrench (for M4 screws)[electric driver recommended; some screws are long]
-
Flathead screwdriver (or similar object, for tensioning pulley)
-
Sidecutter (or similar cutter, for snipping zipties)[if disassembling pulley]
-
Zipties, 3mm width tail [if disassembling pulley]
-
Silicone grease [if lubricating pulley]
Screw Legend:
-
(4) M3 x 6, flat head
-
(3) M3 x 16, flat head
-
(1) M3 x 25, flat head
-
(3) M3 x 35, button head
-
(4) M4 x 20, flat head
-
(2) M4 x 35, button head
-
(1) M4 x 40, button head
[Screw legend image to be added]
Important Stuff:
-
Wires run throughout most parts. Some slack is available, but there is no way to fully separate all parts without cutting wires
-
The Beysar nameplate is friction fit, requiring prying to remove and careful bashing to install
-
If the charging lever is removed, the pulley will need to be tensioned when re-assembling
PULLEY TENSION / CHARGING LEVER INSTALL
If the charging lever has been removed, the pulley will need to be tensioned. This is usually the second to last assembly step.
-
Assemble the Beysar as much as possible, leaving only the charging lever, grip frame, and grip scale loose
-
Use a flathead screwdriver to manually turn the gear clockwise. Verify that the flaps open. If not, the pulley linkage needs to be inspected
-
Manually turn the gear clockwise until right before the flaps start to open
-
Insert the charging lever in the resting, un-squeezed position. Be careful not to damage the upper microswitch
-
Temporarily insert an M4 x 20 screw in the charging lever pivot
-
Test the operation of the flaps. They should open to almost 90 degrees. If not, remove the lever just enough to disengage the teeth. Turn the gear clockwise and re-insert the lever, advancing by one gear tooth
-
Repeat step 6 until the flaps open as much as possible
-
Install the grip frame and grip scale
Hopefully I wrote most of this tab for no reason and you never need to open it up